Posted on

How to clean your horse

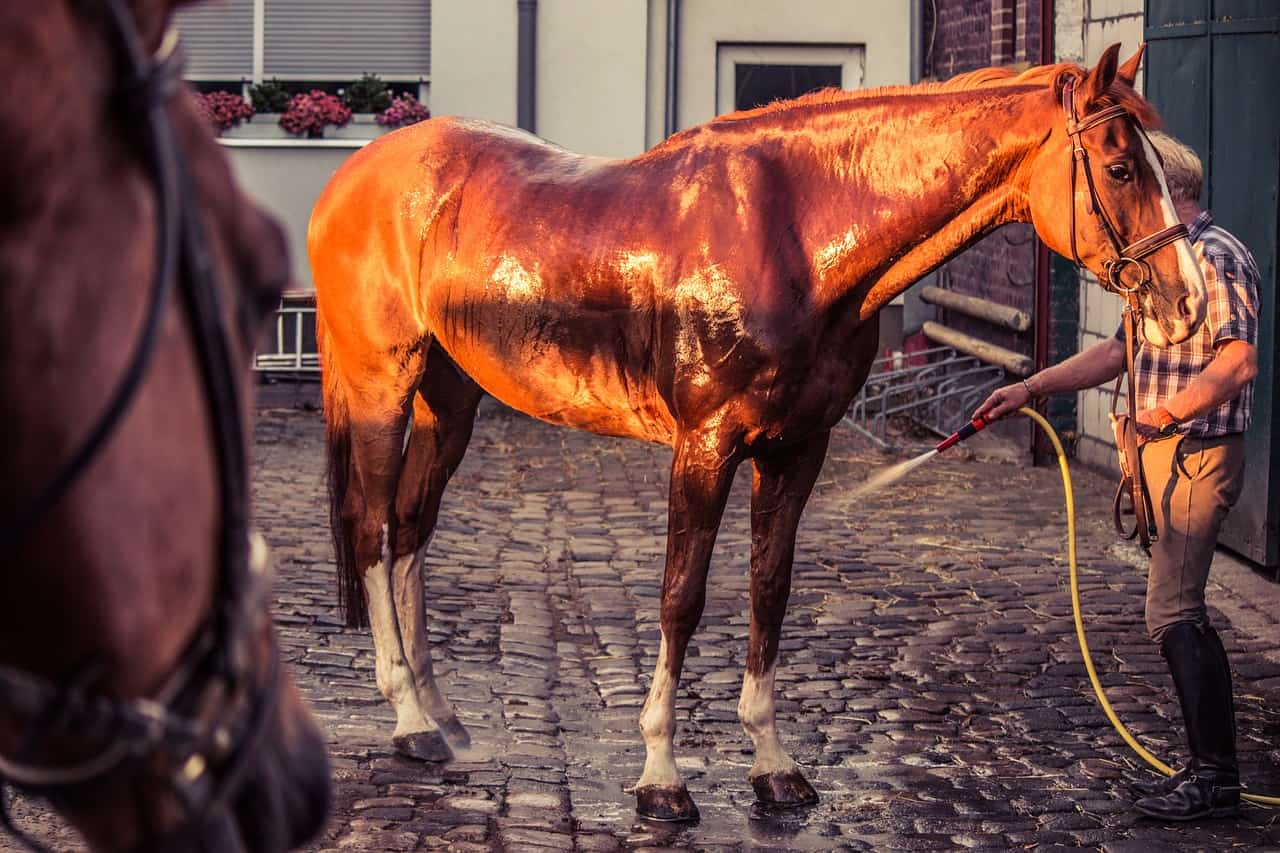
It is important to wash your horse properly to keep its coat healthy. It allows you to identify skin or other issues and helps you bond with your horse. Keep in mind while you are washing your horse to avoid standing in back of it as much as possible, especially while washing its tail.

What you’ll need to clean your horse:

Optional

How to wash your horse

  1. Make sure all the items you need are clean, especially your brushes.
  2. Choose a nice warm day, so that your horse won’t catch a chill.
  3. Find a spot with access to water and a place to secure your horse. Make sure to use a quick-release knot.
  4. Groom your horse before washing it, including the mane and tail.
  5. Use a sponge to gently clean your horse’s face. Do not use shampoo and clean in the direction of the hair. 
  6. Wet your horse. If you aren’t sure of how your horse is going to react, start with the hooves and move your way up. Your horse may prefer a sponge instead of the spray from the hose. Take the time to figure this part out and get your horse comfortable with either option.
  7. Clean your horse’s genitals. Use a clean sponge and gently wipe and clean your horse’s anus and genitals. Remove any stuck-on debris with a sheath cleaner.
  8. Work the shampoo into your horse’s coat with a grooming glove or sponge. You may need to do this in sections to avoid leaving the shampoo dry on your horse’s fur. This will dry it out. 
  9. Rinse the horse either with a clean sponge or hose until the water runs clear and there is no shampoo left. 
  10. Scrap off the water from your horse and use towels to dry it off. Walk it in the sun for 10 minutes or, if it is cloudy, use a cooler. 
  11. Comb your horse’s mane with your fingers first and then the comb and use a detangler as needed. 
  12. Wash your horse’s tail in a bucket with shampoo. Swish the tail around in the bucket. Use a sponge to clean the dock and the top of the tail. Rinse until the water runs clean and there’s no shampoo left.

How often should you clean your horse

It is possible to wash your horse too often. If your horse lives mostly outside, washing your horse once a month is enough. If you need to wash your horse more often due to shows, consider stabling as washing too often will strip your horse’s coat from its natural defences against the weather.

Enjoy the grooming time!

Ready to wash? Check out our grooming products!

Posted on

Riders: How to go bitless safely

Kieffer Kendra bitless bridle

Disclaimer: I’d like to caution this post by saying that not all horses can smoothly go bitless, just like not all horses do well with a bit. It can take time, patience, and work to get you and your horse comfortable together with new gear. For me, going bitless with my sensitive mare was the best decision I could have made. Only you and your trainer can judge whether you and your horse are ready for that journey and if it is right for you. 

Another thing to keep in mind: Any bitless option, in the wrong hands, can be just as harsh as any bit. Don’t think that by going bitless you are necessarily less harsh if you don’t take the time to learn how to use it properly. 

Advantages of going bitless

  • More relaxed forward horse 
  • Improved riding with your seat and aids instead of your hands 
  • Better communication with your horse 
  • Great alternative if a horse has any problems with the bit, either physical or psychological 

Disadvantages of going bitless

  • Going bitless can be just as expensive as trying to find the right bit for your horse
  • There are inherent dangers in going bitless too quickly or with the wrong foundations

The following steps may take you weeks, months, or years to go through to get your horse to go bitless safely. Take your time and make sure that your horse is calm and connected to you every step of the way. Do not skip a step! Get help if you need it!

This list below is inspired by Caroline Rider’s YouTube video and other sources cited at the end of this blog post. I really loved how Caroline Rider explained how to go bitless. The foundations she teaches and the relaxation required are exactly in line with my own training principles. However, I strongly recommend wearing a helmet at all times when riding a horse and keep in mind that there are other bitless options than then ones she mentioned.  

How to train your horse to go bitless

  1. Find the right bitless option to start and fit it properly. 
    1. Key things to keep in mind, side-pulls, hackamore, cross-under and bosals, all act differently and are fitted differently. Here is a link on how to fit each one. 
  2. Start in a confined area – Round pen or riding ring 
    • Groundwork
      1. Put on the bitless bridle or solution you’ve chosen without reins and let your horse walk off without you. Notice any signs of discomfort. This is your first queue to know if your horse is comfortable with the bitless solution you chose. 
      2. Add the reins and walk your horse around from the ground. 
      3. Show your horse what if feels like when the reins are used to go left and right. Make sure your horse yields to the pressure in a relaxed manner.  
      4. Show your horse what pulling up to a stop looks like using the reins. 
  3. Check your foundations 
    1. Mounting block – Your horse should be calm and responsive. You should be able to mount without having to hold back your horse or worry about it walking off without you. If your horse does this with a bit, you may want to start there and then work it again with your bitless option.  
    2. Contact – At a walk, work your horse within the appropriate contact for your bitless option. You may need a lot less contact than you are used to, so take your time. Make sure to maintain your horse’s attention while checking whether you can move forward and stop within a relaxed and calm frame.  
    3. Flexions 
      • Vertical – Put tension on the reins and release as soon as your horse relaxes calmly. 
      • Lateral – Work left and right carefully. Make sure to release as soon as your horse relaxes.  
    4. Back up – Much the same as the flexions. Ensure that your horse is again calm and relaxed. 
    5. Disengage the hind end – This is like disengaging your horse’s engine. It will keep you safe and ensure that you have brakes. Caroline Rider shows very well how to do this in her video. It’s important to drill this training aid into your horse and yourself so that if you ever have to stop quickly, you have that option.  
    6. Increase the pace very gradually. Only once you are both 100% comfortable with a gait should you progress to the next. 
  4. Enjoy a relaxing trail ride with your horse! Keep it short a few times without too much excitement.

Conclusion

In short, as much as I love bitless, it isn’t for everyone. Make sure to transition to bitless slowly and carefully to ensure your safety and your horse’s calm and relaxed connection to you. Most of all, enjoy it! 

Sources:  

Ready to go bitless?

Related Reading

Posted on

Myth: Horses are colour blind

As a horse lover fascinated by all the preconceptions and false information horse people pass on from one person to the next, I thought it would be fun to look into whether horses are colour blind or not. 

Are horses colour blind?

To answer the question, I sifted through these articles and studies and came out with a definitive conclusion.

Conclusion

Horses have dichromatic vision, two-colour vision. So they probably see the world similarly to people who suffer from red-green colour blindness. It means they see degrees of blue, yellow, and green, but likely do not see red very well. 

Image credit: Vision in horses: More than meets the eye by Neil Clarkson

Throughout the internet, horse owners have written anecdotes about how their horses react strongly to specific colours. It’s interesting to note that not one specific colour stands out, sometimes orange, yellow, or red. 

Does your horse react to a colour? Let me know in the comments!

Posted on

Review: HandsOn Grooming Gloves

HandsOn Grooming Gloves

As an owner of two horses living with the Canadian springtime mud, I’ve been looking for a solution to get the mud out of my horses’ coats without my hand cramping around a curry comb or exhausting my arm with a shedding blade.

Around the barn, I’d seen my barn friends use these gloves, but never got around to using them until now. Boy, do I wish I had bought them sooner!

Both horses gave my gloved hand a good sniff before letting me touch them with it. That’s okay. I rather give them the time to process. I tried them on my gelding first, as he typically loves to be groomed and he is a bid shredder too! He hadn’t been brushed in a while and was full of dried mud and unshed hair. I went to town with the HandsOn gloves and I was surprised how easy it was to get the grime out of his coat and how much he loved it. Using two hands, instead of one, made a huge difference! It took me less time than usual to get him clean and I was less tired by the end of it. I also used them on his legs and face unlike the traditional curry comb. The gloves stayed firmly in place and were comfortable to use. I also loved that removing the hair from the gloves was easy and didn’t require picking out hairs from a brush or comb.

My mare, who doesn’t like to be groomed, loved my scratching her pole with the gloves and enjoyed the shoulder and chest massage. She was happier with the gloves than the curry comb or the massage curry comb that I have for her. She had less fur to shed and was less dirty, but the gloves did their magic on her as well.

When I was done, I gently hand-washed the gloves and hung to dry. You don’t have to clean them every time. I did to see how easily they could be cleaned.

Once it warms up a bit, I look forward to using them to give my two horses a good bath. I’ll make sure to take a video of that.

In the meantime, here is the promotional video from HandsOn.

https://youtu.be/AXnDRH7o2DQ

To conclude, I recommend the HandsOn grooming gloves to level up your horse grooming routine or even to use on your other pets. Just make sure to buy different gloves for each pet for hygiene reasons!

Ready to buy? Click Shop below to order yours!

Posted on

Ultimate Equestrian Spring Cleaning List

If you are in self-isolation or spending less time at the barn because of COVID-19, this list should help keep your mind off of it and get you and your horse ready for spring.

Tack

  1. Clean and condition tack thoroughly.
  2. Inspect for cracks and stretching and have any damage repaired. Replace tack as needed.
  3. Check your saddle’s fit or plan to have a saddle fitter come out when possible. 

Grooming kit

  1. Disinfect your brushes, especially your hoof pick, and brush box.
  2. Go through your horse products and throw out the very old/expired ones. 

Blankets

  1. Fix and wash your horse’s winter blankets.
  2. Pull out your rain sheets and inspect them for tears. Waterproof as needed.

Clothing

  1. Go through your riding clothes to see if they still fit or need to be replaced. 
  2. Clean your winter boots and prep them to put them away. Take your summer boots out and inspect them. 
  3. Check your helmet’s expiry or manufacture date. They should be replaced every 5 years or after a fall.

I hope this helps during this trying time. Let me know how far you get down the list.

If you are missing the barn conversation, feel free to join the conversation on Facebook.

Posted on

Equine Nutrition: Biotin

This is the third instalment of my series on Equine Nutrition. If you’ve missed the previous posts, here they are Vitamin E and Selenium.

As equestrians, we all want the best for our horses and part of that is understanding nutrition. As a horse and barn owner, I’ve always had an interest in digging deeper into recommendations from equine experts.

I examined these three articles to write this abridged article on biotin for horses. When you have a moment, I recommend you read through them, especially the one from Kentucky Equine Research (KER). 

Biotin Basics published by Kentucky Equine Research

Biotin: Does it work? By Stacey Oke, DMV, MSc

Should You Feed a Biotin Supplement? By Dr. Nerida Richards

Key notes on biotin in equines

  • Biotin, associated with vitamin B, is a nutrient that is only ingestible.
  • It is generally recognized as a great hoof supplement, especially in conjunction with copper and zinc.
  • To improve hoof health, add between 15 mg to 25 mg of biotin per day is needed.
  • Biotin can only improve new growth, not previous growth so you’ll see results in 8 to 15 months.
  • Biotin supplements have a shelf life of only 6 months and are expensive—buy only as much as you can use.
  • There have been no dangers found in overfeeding biotin.

What to do to improve hoof quality

  1. Reduce sugars—Look at your horse’s nutrition as a whole and reduce sugars.
  2. Evaluate current biotin and zinc levels—Look at your hay analysis and grain content.
  3. Add biotin (in combination with zinc and copper as needed)—Up to 25 mg.
  4. Review after at least 8 months—Check the hoof growth after 8 months for improvements but remember it can take up to 15 months. If no improvement, check with your vet. There are likely underlying factors that are inhibiting biotin absorption.

In closing, adding biotin to your horse’s diet can be beneficial for your horse’s hooves; however, evaluating your horse’s nutrition also needs to be done to ensure proper overall nutrition.

Posted on

Equine Nutrition: Selenium

This is the second post in my nutrition series. If you missed the first one on vitamin E, here it is.

As equestrians, we want the best for our horses and part of that is understanding nutrition. As a horse and barn owner, I’ve always had an interest in digging deeper into recommendations from equine experts.

This week, I read through these two articles and summarized their notes and recommendations below for you:

Keynotes on Selenium in Equines

  • Selenium, an essential nutrient that horses get from grazing, is an antioxidant. It is also used in Thyroid function, muscle function, and immune system. It can also help prevent certain forms of cancer.
  • The soil in North America is poor in selenium, so pastures are equally poor.
  • Horses who work hard, such as endurance mounts, may require additional selenium.
  • Selenium and vitamin E go hand-in-hand: deficiencies in Vitamin E or Selenium can be compensated for if the other is plentiful.
  • Supplemented selenium has a good absorption rate compared to others.
  • A total of 3 mg of selenium daily is enough for most horses
  • Selenium deficiency can be hard to identify if the horse receives enough vitamin E, early signs include work intolerance, poor hair coat, and early onset of problems related to ageing.

What to do

Evaluate current feed—Look at the selenium content in your hay and other feeds and grains, if they are at 3 mg, awesome!

If Selenium deficiency is suspected—contact your veterinarian to have a blood test done. With advice from your veterinarian, add a selenium supplement to your horse’s diet. Careful—Work with your veterinarian to calculate how much selenium is currently in the horse’s diet, forage and grains), then supplement. Too much selenium and selenium toxicity can happen fast and be deadly.

Conclusion

Selenium is an essential nutrient for horses in North America, so it should be supplemented and in cases of deficiency, consult your veterinarian.

Hungry for more? Here is the next post in the series Equine nutrition: Biotin.

Posted on

Equine Nutrition: Vitamin E

As equestrians, we all want the best for our equine partners and part of that is the nutrition equation. As a horse and barn owner, I’ve always wanted to dig deeper into the nutritional recommendations from industry experts. 

I dug into three articles written by experts and pulled out their key points and takeaways: The first article “When Do Horses Need Vitamin E?” by Clair Thunes, PhD, the second by one of my favourite sources KER “Understanding Vitamin E in Equine Diets,” and the third article titled “Why your horse needs vitamin E” by renowned rancher Heather Smith Thomas

I strongly encourage you to read these articles when you have time as they are dense in information and great resources. The quick and short version is below. 

Key Notes on Vitamin E in equines 

  • Vitamin E, a fat-soluble vitamin, functions as an antioxidant and helps maintain muscles, nerves, and immune cells. 
  • Horses can’t produce Vitamin E, so they typically get it through grazing.  
  • Experts recommend about 500 IU daily as a maintenance level for a 1,100-pound horse in light work. 
  • Signs of Vitamin E deficiency include “muscle soreness and stiffness and slower-than-expected recovery” (TheHorse.com). 
Photo by Free Nature Stock from Pexels

Key takeaways 

  • Supplement based on diet – Horses on an exclusive hay diet require additional Vitamin E 
  • Supplement based on conditions – Aging or underweight horses as well as horses with health conditions require additional Vitamin E. 
  • Keep an eye out for signs – When in doubt, a blood test can determine if there is a deficiency. 

To conclude, Vitamin E is an essential nutrient that may need to be supplemented based on your horse’s diet, age, underlying conditions, and work.  

Hungry for more? Here is the second post of the series: Equine Nutrition: Selenium.

Posted on

Equestrian: 3 Bit Tips

Any horse rider knows, it can be a nightmare to choose just the right bit for your horse. As a rider and owner, I’ve more than once found myself in front of the bit rack at the tack shop, both mesmerized and paralyzed by the choice.

I found two articles to help demystify the bit question. The first article How Horse Bits Work and Basic Rider Uses published by Horses and Horse Information discussed the different actions the bit has in the horse’s mouth and debunks the myth that to control “a big animal, one needs a strong bit.” The principle is that correctly fitting bit and bridle will create pressure from which the horse will move away.

In the second article Understanding Bits by Stan Walchuk Jr., the author suggests putting bits in two categories: snaffle and curb. The snaffle bit has no shanks or levers. The article also discusses the raised ports to relieve tongue pressure and apply pressure on the roof of the mouth and gives examples of the different types of bits. It further discusses the correlation between bit severity and training, by stating that severe bits should not be used with green horses or inexperienced riders.

Bit checklist

After reading these two articles and my experience, here are three things you should consider when looking for a new bit for your horse.

  1. Width—Measure your horse and buy the appropriately sized bit.
  2. Shape—Consider the shape of the bit and your horse’s mouth to reduce or add pressure.
  3. Leverage—Look at how much pressure the bit exerts in the horse’s mouth.

To conclude, you now know the bit basics before deciding to change or buy a bit. Happy shopping!

My name is Chloe. I’m a passionate equestrian, horse lover and hobby farm owner with three horses in my care. I’ve been riding (on and off) since the tender age of 6 and love to discuss anything horse-related. Feel free to connect with me at @eqnextdoor on Twitter or Equestrian Next Door on Facebook.

Posted on

Review: Initiation to trimming by Metta Equus

I recently attended the Level 2 Initiation to trimming offered by Metta Equus after taking the prerequisite Level 1 Recognizing and developing healthy hooves. In case you missed it, here is the review of Level 1.

Recap: Who Is Metta Equus?

Metta Equus is a company started by two Quebec Hoof Care Practitioners and businesswomen, Maia Chaput and Catherine Larose. Both are highly respected in our community for their barefoot trimming and ability to rehabilitate horses which nasty foot issues.

The Clinic

It was another big day of learning! Maia and Catherine were once again amazing hosts and eager to share their knowledge. Although there were some familiar faces from the previous clinic and some fresh faces, we were a smaller group of roughly 15 equestrians.

Topics

  • Review of the key points from Level 1
  • Safety measures while trimming
  • Horse movement and hoof analysis
  • Trim demo
  • Hands-on practice

Overall

The structure of the day flowed well and although I worried about taking too much off or mishandling the rasp during my first trim, I took to the work well.

For the hands-on practice, the attendees were split into two groups. The smaller groups allowed for personalized coaching and conversation. I was in Catherine’s group and she is passionate about her work and shared her infectious enthusiasm with our smaller group as we analyzed our hooves before taking the rasp to them. It may have been the first time I took a rasp to a hoof, but Maia and Catherine had prepared us well for the task.

Pros:

  • Great information on safety and key emphasis on this.
  • Small groups made for better learning.

Cons:

  • I feel this point is more of a caveat: the cadaver hooves do have a strong smell to them after some time and make sure to bring gloves that you don’t mind throwing out after. There are body fluids involved that are potentially less than healthy. I suggest a light lunch and making sure you aren’t too partial to your hand protection and the towel on your lap.

Take Aways

  • A horse’s hoof is like the rings of a tree: they can tell you so much about the horse’s health, nutrition, movement, and past.
  • Less is more! And often is better! Take off less and trim more often.
  • If the horse grows something back that you took off, it’s because the horse needs it. Leave it alone!

The next steps for me are to practise with Maia and Catherine to trim my horses occasionally. I took this clinic with the intent to learn and was rewarded with a wealth of information and a greater understanding and appreciation for the work each hoof care practitioner does.

I strongly encourage you to check out their website and to take their clinic. It is time and money well spent. As they say, no hoof, no horse!